Paper making is a fun and satisfying activity that we often do in our Meadow space with our children over two years. It makes a perfectly sustainable, environmentally friendly sensory play option.
What you will need:
- A large pile of shredded paper, egg cartons or cardboard - enough to fill a really large bucket, container or tub.
- A suitable stainless steel tub or very large bucket
- Water
- Some paper making containers. This constant of a solid container (yellow in ours) and a mesh container (blue)
- Fresh or dried flowers, petals, leaves
- Any art supplies such as cut paper or the waste from the pencil sharpener!
- A stick blender
- A handful of enthusiastic children!
How to make the paper
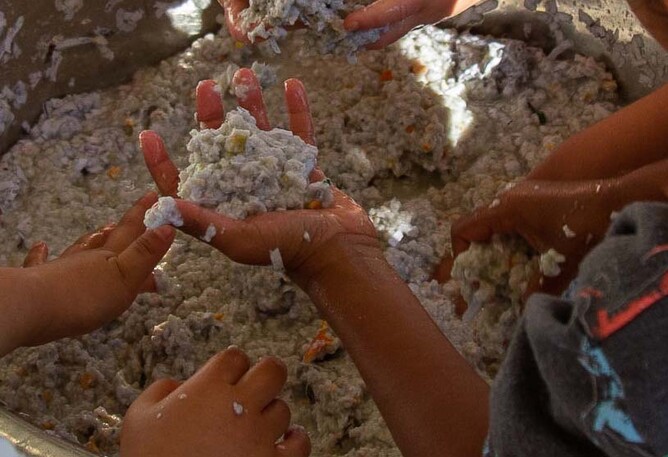
Firstly, we mix any kind of paper (shredded paper, egg cartons, cardboard and also pencil chips) with plenty of water to make a pulp. We don't recommend using coloured paper as it often does go a strange grey colour, although we do find the blue egg cartons make a great blue end result. We use our hands to make it squish it before using a blender to blend to a fine pulp. Children enjoy the texture of the paper transforming from hard to soft as the paper absorbs the water. It is perfectly sustainable sensory play. Some children love to put some paint colour in, so we can choose our own original coloured paper! We also use some vegetable or fruit skins to add scent and colour to the paper pulp. I always try to save some mandarin skins during the winter months so we can use it within our paper. The pulp smells delicious!
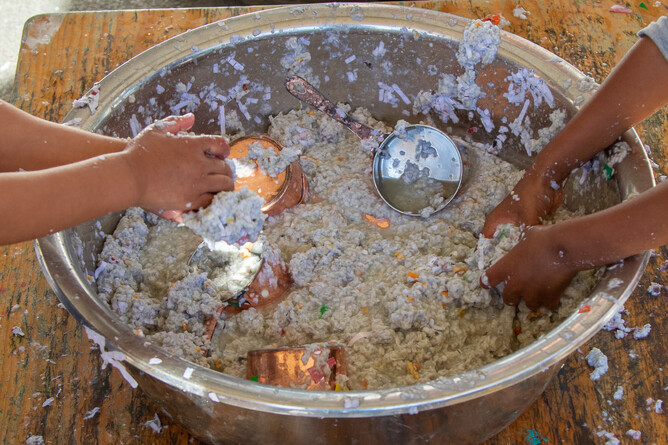
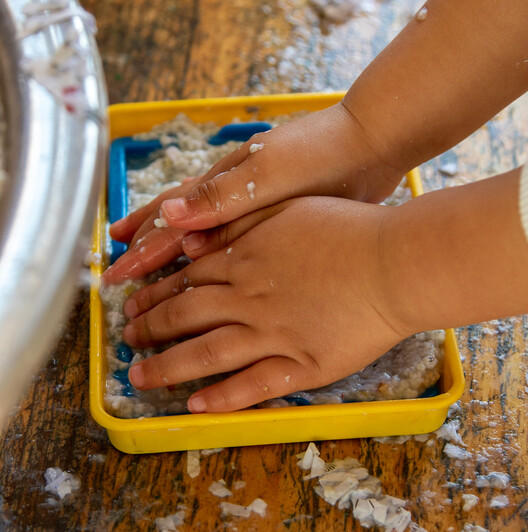
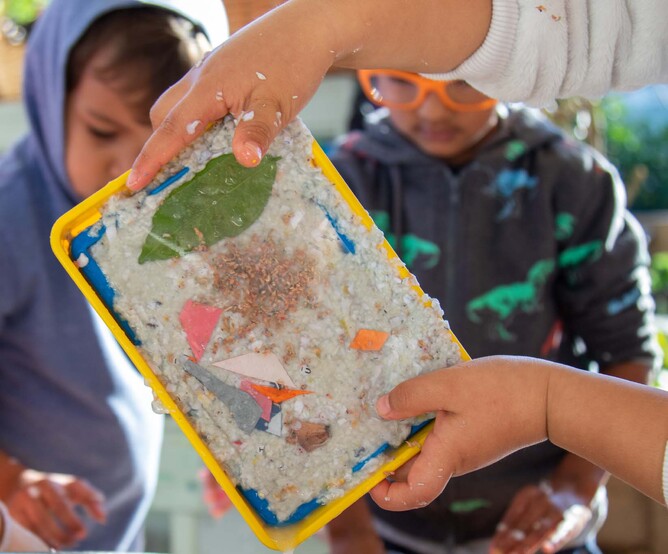
In the following image you can see what the paper maker looks like. A blue and yellow plastic layer and a fine mesh. We use measuring cups or small decorative cooper pots to scoop the pulp mixture out onto the paper making tray.

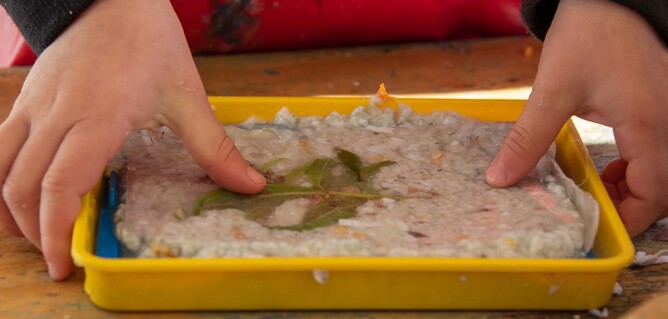
We flatten the pulp and decorate with colourful tissue paper or plants. Children love decorating with beautiful flora from our garden. One of our teachers, Emily made a supersized handmade flower press, so there are always beautiful flowers and leaves that we can use to decorate the paper!

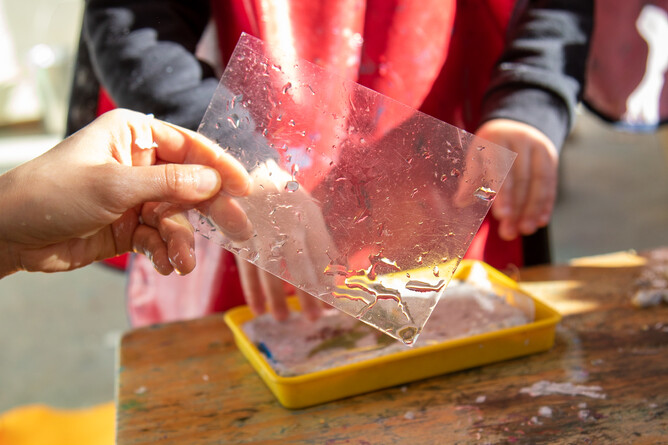
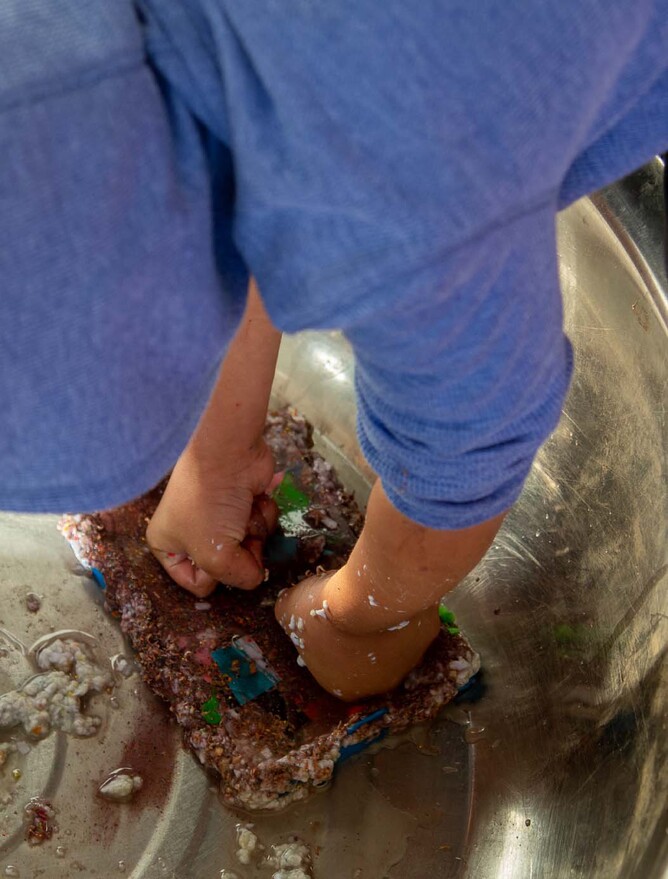
After finishing the decoration, we place a clear sheet on it and press from the top to get the excess water out of the pulp. Then we take the yellow container off, put the blue container with the paper in the big metal bowl and again press very hard to take as much water as possible. Children use their whole bodies to press as hard as possible in this process!
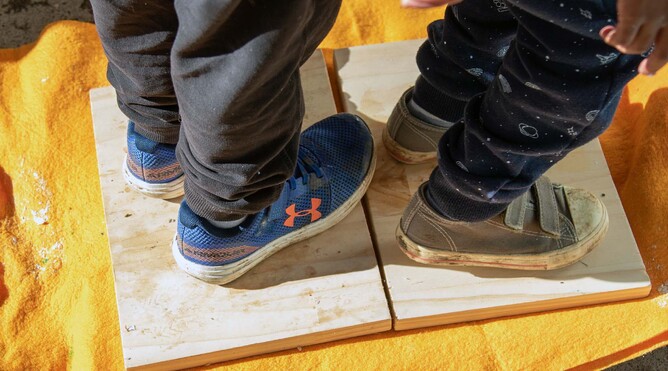
Then we remove the paper with the mesh and clear sheet out of the blue container, put it between the felt and place wooden boards on top of it, and we press or stamp on the boards to take the last excess water out of the paper!
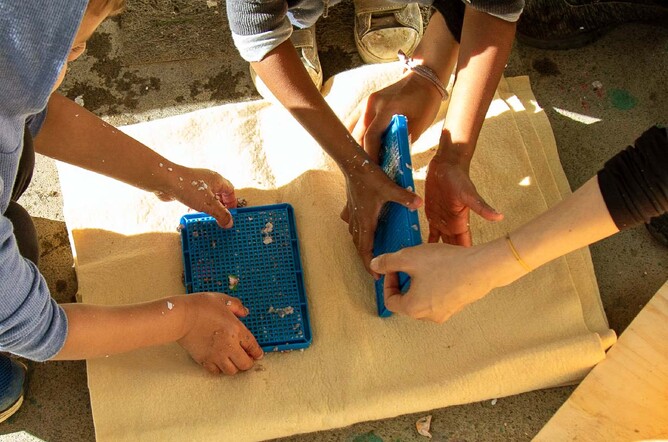
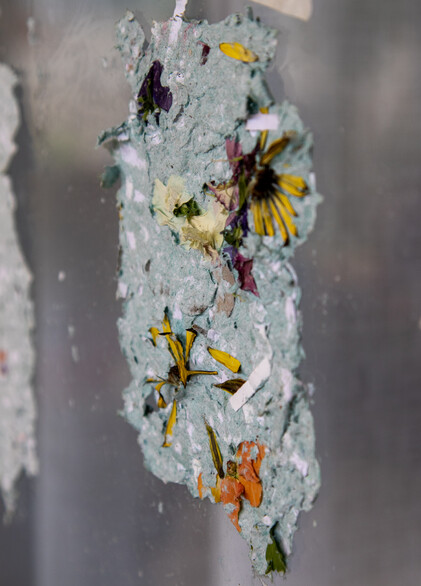
Finally, we take the mesh and clear sheet off and throw it onto the window! I really love to see the children’s proud and satisfied face when they finally see the result of what they have made.

As you can see from all the process, the children need lots of patience to follow all of the instructions to make their own paper. However, some children are able to adapt quickly and get really attracted to paper creation! Another great thing about paper making is that after they make it, children can observe how the paper changes its texture and colour as it gets dry. Some of the children look forward to taking it home that they frequently come back to observe it, asking me if it is ready to take.
I hope you enjoy making paper also!
Sayōnara,
Mariko